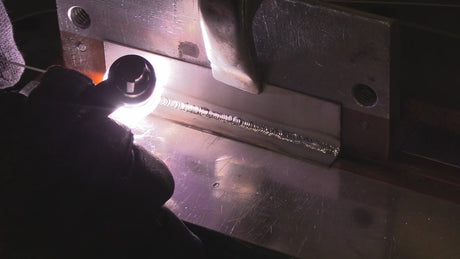
How to TIG Weld series (The Complete Beginner-to-Advanced Guide)
AC DC tig welder under 1000 dollars
Setting up a new TIG Welding Machine
CK worldwide MT200

Primeweld TIG225 setup

What Is TIG Welding?
Textbooks, and authority sites like millerwelds.com state that TIG welding uses a non-consumable tungsten electrode to create an arc that melts the base metal.
Don’t let the term non-consumable confuse you because tungsten electrodes are definitely a consumable.
The tungsten is not consumed into the weld. Or at least its not supposed to.
Tungsten is consumed by repeated sharping just like a pencil.
Filler metal also called “TIG rod” is added separately by hand, and shielding gas (usually argon) protects the molten weld puddle from exposure to air which causes contamination .
What makes TIG unique from other welding processes like MIG, Stick, and Flux core:
- Separate control of heat and filler
- Extremely clean welds
- Precise puddle control
- Works on thin and thick materials
- Ideal for aluminum, stainless, and carbon steel, titanium, magnesium, copper, pot metal, chromoly, nickel alloys, and others.
Because of this precision control, TIG welding is used in:
- Motorsports & fabrication
- Aerospace
- Food-grade stainless work
- Pipe welding
- Artistic and precision fabrication
What You Need to TIG Weld
Before striking an arc, let’s cover the essentials.
TIG Welder also called a TIG welding machine and sometimes refered to as a TIG power source.
For the best experience, You’ll need a TIG machine capable of both DC and AC current:
If all you have is a DC TIG welder, that is ok to get started with but since AC/DC tig welding machines have become so affordable, I would strongly recommend an AC/DC tig welder so that you won’t be limited.
- DC output (for steel and stainless)
- AC output (for aluminum)
- Foot pedal or fingertip amperage control
Both the PrimeWeld 225 and 325 tig welders, and the CK worldwide MT200 come equipped with a foot pedal and there are plenty of tutorials here to show how to get the most out of either machine
Torch, Cables, and Controls
Common TIG torch sizes:
- 17 series – general purpose air cooled (most common)
- 26 series – heavier duty air cooled
- 20 series – compact water-cooled
- 9 series - compact air cooled
A torch setup typically includes:
- Torch body
- Collet
- Collet body or gas lens
- Insulator heat shield
- Cup
- Back cap
A gas lens setup is strongly recommended because it improves gas shielding and makes seeing the puddle easier due to increased electrode extension.


Shielding Gas Basics
Most TIG welding uses 100% argon. Don’t even waste your time trying to use MIG gas (75/25)
Typical flow rates:
- General rule of thumb is 2 to 3 CFH per cup size
- 10–15 CFH for a #5 cup
- 20–30 CFH for a #10 cup
Helium or argon/helium mixes are sometimes used for thicker aluminum, but pure argon is perfect for learning and will likely be the only gas you ever need for TIG.
Good shielding is critical — poor gas coverage causes:
- Dirty welds
- Gray or black discoloration
- Porosity
- Tungsten contamination
Tungsten Selection (Simple Version)
Tungsten is what creates the arc. The type you use matters.
Common tungsten types:
- 2% Lanthanated (blue) – excellent all-around choice for all metals
- Rare earth / E3 (purple) – very stable and versatile
- CK worldwide LaYZr - very stable and versatile
- Thoriated (red) – DC only (less popular now due to reported safety concerns)
Tungsten prep basics:
-

- Cut with grinder or diamond wheel…don’t snap to avoid splitting
- Grind lengthwise, not around
-
Sharp point for carbon steel & stainless
- Balled or rounded tip for AC aluminum (or let the machine form it)
A clean, properly shaped tungsten makes TIG welding dramatically easier.

Choosing Filler Rod
Filler metal should match the base material or be designed to be compatible with base metal being welded.

Filler metal in stock at weldmonger.com
 Common filler rods:
Carbon Steel and chromoly TIG rod
- ER308L
- ER309
- ER312
- 4043
- 5356
Rule of thumb:
- Use smaller filler for thin material
- Keep filler clean
- Keep the hot tip of the filler rod inside the shielding gas
Understanding Polarity: AC vs DC
DCEN (Direct Current Electrode Negative)
Welding current flows from negative to positive so DCEN current flows from the electrode to the base metal.

Used for:
- Carbon Steel and Chrome-moly
- Stainless steel
- Nickel alloys
- Titanium
- Other metals like copper, cobalt alloys,
Provides good penetration and stable arcs.
AC (Alternating Current)
Used for:
- Aluminum
- Magnesium
- Pot metal
- Cast iron using aluminum bronze filler metal
AC alternates between electrode negative and electrode positive providing:
- Cleaning action (oxide removal)
- Penetration
Modern machines let you adjust AC balance and frequency.
AC balance lets you fine-tunes cleaning vs penetration.
AC frequency lets you adjust the arc focus
Amperage Basics (Simple Rule of Thumb)
A good starting rule:
- Steel: ~1 amp per thousandth
- Stainless: ~0.8 amps per thousandth
- Aluminum: ~1.2 amps per thousandth
Example:
- 1/8" steel → ~125 amps
- 1/8" stainless → ~100 amps
- 1/8" aluminum → ~150 amps
Use the pedal or amperage control to fine-tune while welding.
Joint Preparation Matters More Than You Think.
Remember The 3 C’s
- Clean
- Clean
- Clean
Before welding:
- Remove oil, grease, paint, rust, mill scale
- Clean stainless and aluminum with dedicated brushes
- Wipe with acetone if needed
- Fit joints tightly
Clean metal = stable arc + better looking welds.
Torch Angle, Arc Length, and Shielding hot tip of filler rod
These three fundamentals control almost everything.
Arc Length
- Keep it tight
- About the diameter of the tungsten or less
- Long arc = wide, dirty, unstable puddle

Torch Angle
- Aim for about 10–15° push angle
- Keep the tungsten pointed in the direction of travel
- Torch angle can be very forgiving provided Arc Length is good.
Shielding the hot tip
- Keeping the hot tip of the filler rod inside the argon envelope will prevent excess oxides in the puddle
- A gas lens cup can help due to larger argon area
- Keep the tip inside the argon but far enough from the arc to prevent the tip from melting and balling
Feeding Filler Rod Correctly
Key principles:
- Keep hot tip of filler rod inside the shielding gas
- Dab at the front edge of the puddle
- Don’t melt the rod with the arc
- Feed rhythmically
Many beginners struggle here — practice feeding rod without welding first.
Feeding filler rod Tips Video
How to Start a TIG Weld
- Position torch
- Establish arc
- Form a small molten puddle
- Add filler
- Begin moving forward
Avoid stabbing motions. Think melt → add → move.
How to Stop a TIG Weld Cleanly
A clean finish matters.
- Slowly taper off amperage
- Add a little extra filler rod at the end
- Let the puddle solidify under gas coverage and allow post flow to run out
- Don’t snap out abruptly
This prevents craters and cracking.
Common TIG Welding Mistakes (and Fixes)
Dirty or gray welds
→ Improve gas coverage and cleaning
Tungsten dipping
→ lengthen arc, slow down, stabilize hands
Porosity
→ Check gas flow, leaks, clean metal more thoroughly
Cracking
→ Add more filler rod, especially at the start of the weld, reduce heat input, preheat thick metal, improve joint design
Overheating
→ Back off amperage, move faster, pause to let cool between passes.
( these are general troubleshooting guidelines …each situation is unique)
How to Practice TIG Welding - A Proven Structured ABC, 123 method
Practice should be structured, not random.
Recommended drills in order:
- Carbon steel Straight beads on plate without filler rod
- Carbon steel Straight beads on plate with filler rod
- Padding beads on carbon steel
- Padding beads on aluminum
- Padding beads on both steel and aluminum and alternating in between
- Outside corners on carbon steel
- Lap joints on carbon steel
- T-joints on carbon steel
- Corner joints on aluminum
- Lap joints on aluminum
- Tee joints on aluminum
Focus on:
- Consistent puddle size
- Smooth rhythm
- Torch angle discipline
- Clean stops and restarts
What to Learn Next
Once you understand the basics, move into material-specific guides:
- How to TIG weld aluminum
- How to TIG weld stainless steel
- How to TIG weld carbon steel
- How to set AC balance and frequency
- How to choose tungsten and filler
- How to use a gas lens
- How to weld thin material
- How to weld tubing and pipe
TIG welding is a skill built on control, patience, and repetition. You don’t need to rush it. Master the fundamentals, keep your setup clean, and practice with intention.
If you do that, the “stack of dimes” look becomes a byproduct — not the goal.
This page is your foundation. Everything else builds on it.
See the One Page TIG welding Rules of Thumb