How to TIG Weld Aluminum (Back to Basics, Done Right)
TIG welding aluminum can feel frustrating at first. But the good news is that like most anything, once you get the hang of it and understand some fundamentals, you wonder why it seemed hard at first?
AC DC tig welder under 1000 dollars
The aluminum weld puddle looks different, the arc is much noisier, and every mistake seems to be a bigger deal than when tig welding steel.
But once you understand why aluminum behaves the way it does, TIG welding becomes much easier — and honestly, pretty fun.
In this article, I’ll walk you through how to TIG weld aluminum the right way, starting with the fundamentals and building up to real-world technique you can actually use in the shop.
This isn’t theory. This is the same approach I use when teaching beginners and experienced welders who want cleaner, more consistent aluminum welds.
Why Aluminum Is Different From Steel
Before touching the torch, you need to understand what makes aluminum unique.
Aluminum conducts heat fast
Aluminum pulls heat away from the arc much faster than steel. That’s why it often feels like nothing is happening…
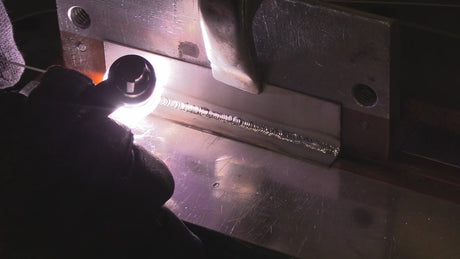
The arc starts and you can immediately see an area that is somewhat shiny. But that is the cleaning action, as you increase amperage you see the actual shiny puddle.
That is a common issue with beginner tig welders, it is easy to mistake the cleaning action for the puddle and beginners often try to add filler rod prematurely….before an actual puddle is established.
Aluminum has an oxide layer
Aluminum oxide melts at about 3,700°F, while the base aluminum melts around 1,200°F. That oxide layer has to be removed or broken up in order for a distinguishable weld puddle to form.
This is why we use AC TIG welding on aluminum — the cleaning action removes oxide while still allowing penetration.
Aluminum cracks easily without filler
Aluminum has a characteristic called hot shortness
If you try to autogenously weld aluminum (no filler), it will usually crack as it cools. Aluminum has high shrinkage and poor crack resistance without filler metal.
It is ok to practice without filler rod just to get familiar to reading the puddle but just realize you will get cracking.
What You Need to TIG Weld Aluminum
TIG Welder Settings (Big Picture)
You need:
- AC TIG capability
- Adjustable amperage
- Ideally adjustable AC balance and frequency
Modern inverter machines make this much easier, but you can still weld aluminum with more basic AC TIG machines.
Shielding Gas for Aluminum TIG Welding
Use 100% argon.
That’s it. No mixes needed for most work.
Typical gas flow:
- 2 to 3 CFH per cup size using #4-8 size cups
- Example 10–15 CFH for a #5 cup
- Example 16-24 CFH for for a gas lens #8 cup
Good shielding is critical. Poor gas coverage shows up fast as:
- Gray welds
- Oxides in the puddle aka pepper in the puddle
- Contamination
- Too much argon flow causes an Unstable arc
Either a standard collet body or gas lens can be used effectively for tig welding aluminum.
A gas lens allows for a longer tungsten extension while still providing good gas coverage.
Tungsten Choice and Prep for Aluminum
You’ve got a few good options here.
Recommended tungsten types:
- 2% Lanthanated (blue)
- Rare earth / E3 (purple)
- LaYZr by CK (chartreuse)
Both work well on AC and DC.
Tungsten prep for aluminum
You have two options depending on your machine:
- Slightly rounded tip
- Small balled end formed naturally by the arc
- At low an medium amperage, a blunt taper works fine
Modern inverter machines usually prefer a tapered or slightly rounded tip, not a big ball.
Keep the tungsten clean. Any contamination will show up immediately in aluminum.
If you get aluminum on the tungsten Stop welding and re prep the tip or put a new tungsten in before resuming the weld.
Filler Rod Selection for Aluminum
Two common fillers cover most situations:
4043
- Flows easily
- Lower crack sensitivity
- Great for beginners
- Smooth-looking welds
5356
- Stronger
- Stiffer puddle
- Better for parts that will be anodized
For learning, 4043 is usually the easiest place to start.
Filler rod size
- Thin material → 1/16"
- Medium material → 3/32"
- Thick material → 1/8”
Cleaning Aluminum (This Matters More Than You Think)
Aluminum must be clean — really clean.
Some
But that doesn’t mean that every piece of aluminum must be wire brushed before welding.
There is a difference in brand new aluminum sheet that has been stored indoors and an aluminum handrail that was on the beach.
And there is also a big difference in a simple fillet weld on square tubing and a welding test that gets X rayed.
Act according to the job requirments.
Not every aluminum weld joint needs wire brushing, abrasive cleaning, carbide burring, or even a solvent wipe.
For some applications, the aluminum is clean enough to weld without doing anything.
Other applications require abrasives, a carbide burr, wire brushing, or some combination of these.
It depends on the job.
Best practices for welding dirty or oxidized aluminum:
- Degrease with acetone first
- Use abrasives designed for aluminum
- Use a dedicated stainless steel brush
- If using a wire brush on a grinder, use low pressure and low speed
- Clean both sides when possible
Do not use a brush that touched carbon steel.
AC Settings: The Basics Explained Simply
AC Balance
Controls cleaning vs penetration.
- More cleaning = wider, frostier bead
- More penetration = tighter cleaning path, cooler tungsten
A good starting point:
- Around 65–75% EN (or 25–35% cleaning) depending on machine display
- Argon flow rate also affects AC balance cleaning action
AC Frequency
Controls arc focus.
- Lower frequency → wider arc
- Higher frequency → tighter, more focused arc
Good starting range:
- 100–120 Hz for all around aluminum welding
Amperage Guidelines for Aluminum
A simple rule of thumb:
About 1.2 amps per thousandth of thickness
Examples:
- .063" → ~75 amps
- .090" → ~110 amps
- .125" → ~150 amps
Set max amperage slightly higher and use your foot pedal to control heat.
Once you get more comfortable with tig welding aluminum, you can set amperage higher and just control the arc with the foot pedal or finger control as you read the puddle.
Torch Angle and Arc Length
This is where most beginners struggle.
Arc length
- Keep it short
- About the diameter of the tungsten or slightly less
Long arc = dirty weld, poor control
Torch angle
- About 10–15° push angle
- Point the tungsten in the direction of travel
- Torch angle can be very forgiving provided arc length is tight
Feeding Filler Rod
Practicing feed filler rod is one of the biggest skill builders.
- Try to Keep filler rod inside the argon envelope ( the hot tip of aluminum filler rod cools so quickly and can be forgiving if you get outside of the argon shield by accident)
- Dab into the leading edge of the puddle
- Don’t melt filler with the arc but rather the puddle
- Feed smoothly and rhythmically
A good rhythm feels like:
melt → dab → move → melt → dab → move…about once per second when learning and slightly faster later when you get more proficient.
Starting the Weld
- Position torch and get comfortable
- Establish the arc
- Form a small shiny puddle
- Add filler
- Start moving
Don’t rush. Aluminum rewards patience at the start.
Ending the Weld Without Cracking
At the end:
- Slowly taper off amperage
- Add a bit of extra of filler while tapering amperage. Also, move the arc around and away from center of crater as you taper amperage to prevent a crater crack
- Let shielding gas continue flowing while holding the torch still to prevent hot tungsten from getting oxidized
Common Aluminum TIG Problems (and Fixes)
Black or gray weld
→ Not enough shielding gas or poor cleaning
Tungsten contamination
→ Arc too short …dipping in the puddle
Cracking
→ Not enough filler or stopping too abruptly
Melt-through
→ Too much amperage or staying in one spot too long
No puddle forming
→ Not enough amperage
Erratic arc
→Too much argon flow rate
How to Practice TIG Welding Aluminum
Don’t jump straight into joints.
Start with:
- Beads on plate
- Padding beads
- Corner joints
- Lap joints
- Tee joints
Focus on:
- Consistent puddle size
- Stable arc length
- Smooth filler rhythm
This builds muscle memory fast.
TIG welding aluminum isn’t about magic settings — it’s about understanding what the metal is doing and staying in control of heat, arc length, and filler.
Once you get those fundamentals down, aluminum becomes predictable and enjoyable to weld.
Master the basics first. Speed and appearance come later.