10 "Rules of the Road" for TIG Welding Aluminum
Rule #1 Only weld aluminum that is weldable.
No technique or cleaning method matters much if the aluminum is not weldable. There are a few high strength aluminum alloys that are not designed to be fusion welded. The main 2 alloys to avoid welding on are 2024 and 7075. 2024 might not crack right away but will fail prematurely in service...7075 will often crack immediately depending on application.

pro tip: if you are asked to weld an aluminum part that has zero welds on it but only rivets or mechanical fasteners, it is probably not a weldable aluminum.
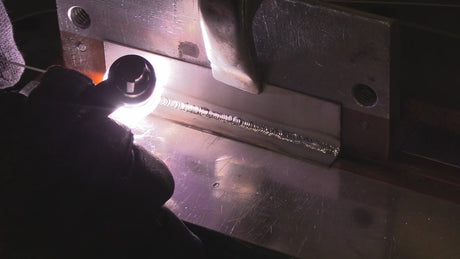
RULE #2. Only weld aluminum that is clean enough (new aluminum is often clean enough. Dirty aluminum needs cleaning)


![]()
RULE #3. Use the right filler rod…3/32” 4043 or 5356 filler rod is a good start
Washington Alloys Aluminum Filler Metal Chart
RULE #4. Make sure your tig torch is plugged in to correct dinse plug in (usually the dinse labeled EN or - with the TIG torch icon but read the manual to be sure)
RULE #5. Use AC current with AC balance set for just enough cleaning action (usually about 1/8” of frosty etching outside the bead)

RULE #6. Set AC Frequency to 60-100 hz when learning. Experiment with higher frequency settings later.


RULE #7. Use the right cup. BIG cups don't work well on Aluminum. Use a #5 thru #8 cup. A #6 gas lens is a great all around cup and a #7 clear cup helps if see better.
![]()
![]()
RULE #8. Use the right argon flow...enough flow but not too much. 2-3 CFH per cup size usually works but test it on scrap to learn the best flow rate

RULE #9. A 3/32” 2% lanthanated, E3, or LayZr tapered tungsten all will be fine for learning and are all usually good up to around 200 amps. If you need to weld thinner than .063” a 1/16” tungsten will work better, thicker than 3/16”, a 1/8” will work better


RULE #10. When using a foot pedal, Set machine amps to around 1.5 X metal thickness… example: 0.100” = 100 thousandths X 1.5 = 150 amps. You won’t always need all those amps but aluminum often needs more heat at first…Use foot pedal if ( or torch amp control) to control amps while welding.

RULE #11. When ending a bead, taper amperage while you move the arc around as the puddle shrinks to avoid a crater crack. Some folks simply move arc to edge of puddle while amperage tapers and find that works.