What does it mean for a TIG puddle to “wet out”?
When molten metal flows smoothly and there is gradual and uniform fusion into the base metal, that is what we call a puddle “wetting out”.
With very few exceptions, its what we want…and it makes TIG welding fun.
Some of the main factors that can help a TIG puddle to “wet out” are
- Clean metal and filler wire
- Quality argon shielding
- Oxide free puddle
Things that prevent a puddle from wetting out are…
- Mill scale,
- Dirty metal,
- dirty filler wire
- Poor argon shielding from too small a cup, too long a stickout, or low purity argon
- Oxides in puddle from not enough argon flow rate, too small a tig cup, not shielding hot tip of filler wire, not snipping end of filler wire between restarts, or not cleaning metal.
And just like with soldering, when surface oxides are present, those oxides really inhibit the way solder flows.
Clean copper that is protected by flux and has not been oxidized from overheating, will allow solder to flow readily.
But overheated copper has a layer of oxide that won’t let solder flow.
One of the challenges with TIG welding aluminum is getting the torch gas flow rate optimized.
In this video, I started out using a flow rate that usually works fine with a #7 gas lens cup.
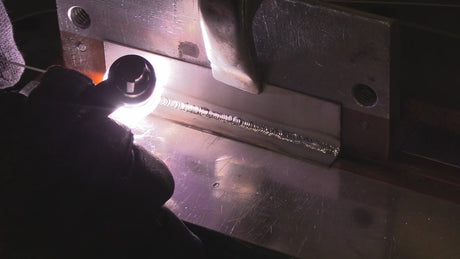
The first arc shot in this video shows a weld puddle that is not wetting out.
So what is it that allows aluminum filler metal to wet out?
To start with, the aluminum metal itself needs to be clean enough.
That might mean a simple wipe down with solvent like acetone to remove dust, grime, or oils.
Or it could mean wire brushing with a stainless brush to remove heavy oxides.
In some cases, like when a critical aluminum weld is x ray tested, It could even mean using a carbide burr to ensure no foreign particles are embedded.
Once the aluminum is clean enough for the application, the cleaning action the AC arc helps to break down any remaining oxide layer to allow the molten puddle to flow.
This is where having the appropriate argon flow rate comes into play.
Every cup has a minimum and maximum flow rate and the only way to really learn that is to experiment with a few test beads.
It helps to have an argon flow tester for reference because flowmeters can differ.
For example, in the video on this page, I used a #7 pro Furick cup along with a gas lens.
At first, I set the flow rate to around 20cfh because that usually works fine with a #7 gas lens on aluminum.
I had to tinker around and increase the argon flow rate all the way up to 30cfh to get the best results and a puddle that wet out.
You can see plainly that the puddle was not wetting out before I increased the flow rate and had no real evidence of cleaning area outside the toe of the weld.
Once I increased the argon flow rate to 30cfh, the puddle wet out much better and you can see a cleaning zone next to the toe of the bead.


1 comment
The flow of the metal at the edge of the bead where you had the correct cleaning action (1:37) really demonstrates what you mean by wetting out (as compared with what happens when there’s insufficient cleaning action (1.07)); it’s like watching water flow over sand. This video’s made me realise I haven’t been paying any attention to this important indicator. In the past, I’ve examined the edge of the bead only after welding and not really understood what’s causing the inconsistency along the edge or how to fix it. In future, I’ll be keeping an eye on the wetting out as my top priority, setting up on a bit of scrap if necessary. Who’d have thought 5CFH could make such a night-and-day difference.
Thank you, big time, Jody.