One page TIG Welding "Rules of Thumb" Guide
A Rule of Thumb is a broadly accurate guide or principle, based on experience or practice rather than theory.
I use a lot of “Rules of thumb” here.
There are definitely exceptions to everything stated here but thats ok.
Also , there is pretty much an exception to every rule in welding...and most other things in life.
Setting up a TIG Welding Machine

Check out our How to TIG Weld Series here
Recommended skill building Video drills:
- Carbon steel Straight beads on plate without filler rod
- Carbon steel Straight beads on plate with filler rod
- Padding beads on carbon steel
- Padding beads on aluminum
- Padding beads on both steel and aluminum and alternating in between
- Outside corners on carbon steel
- Lap joints on carbon steel
- T-joints on carbon steel
- Corner joints on aluminum
- Lap joints on aluminum
- Tee joints on aluminum
Polarity
Polarity is the direction of welding current flow.
A rule of thumb for polarity is AC for Aluminum and Magnesium and DCEN for everything else
Use DCEN polarity for Steels (carbon steels, 4130 chromoly, stainless steels, nickel alloys like inconel and hastelloy..and other corrosion and heat resistant steels)
AC for Aluminum
DCEP is almost never used for tig welding. ( almost)
It’s important to note that you need to plug in the dinse connectors correctly from the start…a common mistake is mixing them up and nothing works right if you do that.
On newer machines, there is often a tig torch icon to indicate the correct dinse.
3 mistakes that almost everyone makes when learning to TIG are:
1. Too long arc
2. Too much angle
3. Not shielding the hot tip of rod
Of these 3, too long an arc is the biggest one
 Tungsten electrodes

For 200 amp and under tig welders, a 3/32” 2% lanthanated electrode will likely be the only tungsten you ever need.
It makes life simpler to use only one type.
There are other options too like E3 (purple), LaYZr (chartreuse) and Ceriated ( usually grey) but I have tested all of them and prefer 2% lanthanated as the one that is best all around …all purpose tungsten for what I do.
Tungsten sharpening…. There are many many ways to do it.


Tungsten sharpeners are very nice to have and for advanced tig welding, can be well worth the cost for some folks.
But to get started, You don’t need a tungsten sharpener.
They are nice to have and convenient…but in my opinion, the money can be spent on things like practice metal and better tig cups when you are just getting started.
For the highest quality welds required in nuclear, aerospace, and Pharmaceutical industries, sure a diamond wheel tungsten sharpener makes sense. But for tig welding simple projects or carbon steel square tubing? Nope
A belt sander and a cordless drill , a bench grinder with a cordless drill, angle sanding disc, or hard rock, all work just fine with very few exceptions.
The main thing is to NOT make super rough grinding marks on the electrode.

It is best if the grinding marks run with the electrode but if the scratches are fine enough, it makes very little difference.
Rule of thumb for tungsten taper:
A needle point gives better starts for really thin metal.
A 30 degree taper works ok for almost everything.
For Aluminum on AC, I usually just put a very blunt taper and let it ball.
Sometimes rounding a slightly tapered tip using a max cleaning setting on AC balance helps maintain a stable smooth arc.
Gas shielding and cups


There is a lot of buzz around specialty cups these days. Especially Furick cups like a Jazzy 10 or Fupa12
And some of them are awesome for specialty metals and certain high end applications like stainless, nickel, and chromoly in motorsports and aerospace industries….
But when you are starting out and just practicing on mild steel, you won’t really benefit much from specialty cups.
One exception might be a clear #7 or #8 furick cup because it actually helps light things up and helps with being able to see better...(at least it does for me.)
To keep things simple, you could use a #7 cup for both steels and aluminum with 14-21 cfh argon flow rate.
Flow rates depend mostly on cup size. Cups are sized by 1/16".
A 7 cup is 7/16” on the inside diameter.
Generally speaking, a rule of thumb for flow rate is 2-3 cfh per #cup size to get you right in the ball park.
The chart below uses 2.5 CFH and will usually get you in the ball park for most cups if your stickout is around the same as the cup size.

A #5 cup with a fairly short stickout will usually work with only 10 cfh and on a weekend when welding supply stores are closed and you can't get any argon, this can help make your argon tank last longer.
Stickout…is the distance from the face of cup to the tip of electrode …rule of thumb is dont go over the inside diameter much. So if you are using a #7 cup, your stickout should be 7/16” or less…or enough to see the tip of the electrode.
Longer stick outs can be used with Furick cups because they have secondary diffusers.


End caps…
Torches usually come with a long end cap. they are fine for practicing and when nothing is in your way. Long caps let you use full length electrodes and that makes it easier to sharpen them.
But There are other shorter options that are more useful when welding in tighter spots.
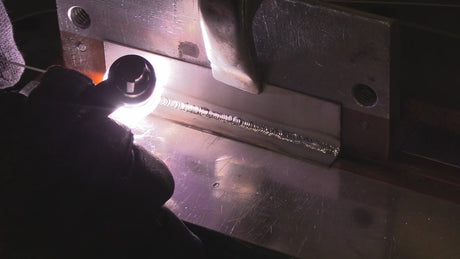
Most 200 amp and under machines come with a #17 style air cooled tig torch like the ones pictured below.
17 style tig torches...Standard collet body vs Stubby with clear cup
![]()
A stubby gas lens setup can make a 17 style torch feel more comfortable, get better gas shielding, and reach tighter areas.
I highly recommend you try one.


Better gas shielding, smaller, more maneuverable. Able to use a longer stickout…are some of the benefits to using a stubby gaa lens setup on your 17 air cooled torch.
Pulse settings.
Pulse capability is a nice to have…not a must have.
It is Best to learn without pulse and then experiment with pulse later after you get plenty of practice reading the puddle without pulse.
Foot pedals…. A foot pedal amperage control really helps…but when learning, it is one more thing to think about…so it can help to set the machine amperage to exactly what is needed and to just press the pedal all the way….after some practice, then amperage can be set higher to get used to adjusting amperage on the fly.
( one amp per one thousandths of thickness up to about 160 amps )
Lift arc vs high frequency…. With lift arc, the tungsten is touched to the metal to start the arc. High frequency start allows the arc to jump the gap like a spark plug to start the welding current without ever touching.
There are some tig welding tasks where very small parts are welded and touching to start is not feasible.
I highly recommend an AC/DC machine with high frequency start option.

One per One rule
…as a rule of thumb, one amp is needed for every one thousandths of thickness up to around 160 amps. (Things actually start changing at around .125 thick but its a pretty good rule of thumb up to then.)
This one per one rule of thumb applies mainly to carbon steel.
A bit less for stainless ( around .8 amps per thou)
A bit more for aluminum (around 1.2 amps per thou)
It’s just a rule of thumb but its a good starting point …there will always be exceptions.
Basic TIG Welder Settings

Aluminum Tungsten Selection, Cups, and Settings
2% lanthanated electrode 3/32” works fine for Aluminum and also as a universal tungsten that will handle everything a 200 amp tig welder can weld.
For TIG welding aluminum a #6 gas lens cup with 12-18 cfh argon is a great choice.
Polarity set to AC for TIG welding aluminum
1.2 amps per one thousandths of thickness.
example .120" thick aluminum 1.2 x 120 = 144 amps.
(Sometimes you need all 144 amps to get the puddle started and then you use the foot pedal or torch amp control to reduce amperage once the part heats up)
AC Balance Setting

Set the AC balance setting to 65-70% EN sometimes labeled as penetration ( on some machines this is depicted differently so set to 30-35% cleaning if that is how the knob is labeled)
Because different machines are set up differently, the way you can tell what AC balance setting is correct on your machine is set to 30% with a 3/32” 2% lanthanated, ceriated, or purple electrode that is slightly tapered.
If the tip melts and completely balls at 125 amps, try turning the knob the other way to 70%.
I know this sounds a bit confusing , but with so many different brands of tig welders available, you can almost flip a coin as to how the AC balance setting is configured.
The rule of thumb for the AC balance setting is that if puddle has pepper dots, increase cleaning to where the puddle is clean and shiny. pepper in the puddle can also be caused by insufficient shielding gas also, so you might also increase cup size or gas flow or both to clean up the puddle if increasing cleaning action doesn’t fix it.
AC Frequency

If your machine has AC frequency settings, a good all around setting is around 100hz.
For thicker aluminum, Especially if you are limited on amperage like say a 200 amp machine, use a lower Hz all the way down to around 50hz or so to get more heat input from the machine.
A rule of thumb for AC frequency setting is higher frequency for thinner aluminum, lower frequency for thicker aluminum. ( there are always exceptions to this rule)
Tungsten will round or ball by itself on AC. Sometimes the tungsten gets a weird shape at the tip so it helps to round the electrode manually either with grinder, or using max cleaning on AC balance. (On older transformer design tig welders, this can be done using a dcep setting just to round the tip…but dont forget to switch back to DCEN before welding)
Filler metal selection
FILLER METAL IN STOCK AT WELDMONGER.CCOM

Diameter of Filler metal…
As a rule of thumb for diameters of filler metal:
For sheet metal, you usually want to use a filler metal that is less than equal to the thickness being welded. but it depends on several factors one of which is personal preference.
Another rule of thumb to guide you is that diameter of filler metal should almost never be larger than your electrode diameter.
Again there are always exceptions. But this holds true most of the time.
What filler metal for what?
There is no one source of information that tells you what filler metal to use for every possible application. In industrial work, a welding procedure will dictate what filler rod is used. But for your shop projects, you will be selecting your filler metal.
Here are a few good resources for filler metal selection.
And here is a link for a stainless steel filler metal chart https://weldingwire.com/Images/Interior/documentlibrary/stainless%20selector%20guide.pdf
For carbon steel, ER70S-2 is the most common tig wire and works fine. Some people prefer ER70S-6 but there is not a huge difference except for full penetration open butt joints.
I would suggest starting off with 1/16” diameter and see where to go from there depending on your projects. You may also want to get some 3/32" and also some .045” for thinner stuff,
4130 chromoly is also commonly welded with ER70S-2 wire for a lot of motorsports applications as well as experimental aircraft welding.
For stainless steel, remember the most common grade of stainless used is 304L. Its welded using ER308L filler because that is the closest available match.
There are lots of other grades of stainless but 304L is the most common.
Rule of thumb for tig welding stainless steel is use the closest match filler metal when you can . If its 316L , definitely weld with 316L filler to match corrosion resistance.
If welding 2 different stainless steels together, go with the higher alloy …example welding 304L to 316L, use 316L filler.
Again, I would suggest starting off with 1/16” and see where to go from there depending on your projects.
You may eventually want some .045” for thinner stuff…or even .030” for really thin stainless steel.
A rule of thumb for tig welding stainless steel sheet metal is use one size smaller filler wire than you would on carbon steel.
For aluminum, 4043 is a good all around filler metal. The newer 4943 works great and has better overall properties than 4043.
5356 is another common filler metal and is often specified for 5000 series aluminum like 5052. It is also used a lot for welding 6061 aluminum
For castings, 4047 helps prevent porosity and flows nice.
Consult the aluminum filler metal chart for specific applications like when a part will be anodized after welding.
Get some 1/16” and see where to go from there depending on your projects. I use 3/32” aluminum filler a lot.
What about silicon bronze? It's great for certain projects and fun to work with for cosmetics, metal art, and special applications… but not as strong as steel weld metal. I like 1/16” and 3/32” diameters.
Seeing the Puddle
Seeing what Is going on is kind of important. If you can see it, how are you going to weld it?
If you already wear glasses and are still having issues seeing the puddle, consider trying a better quality helmet… Auto dark lenses vary in quality and clarity.
Some good auto dark lens helmets are.
- Weldcote Supreme View
- Lincoln viking 3350
- Esab sentinel
- Optrel crystal 2.0
- arc one carrera with 4500V lens

If you use reading glasses at all, you might consider a cheater lens. also called a diopter magnifier…cheater lenses come in different strengths just like reading glasses.
PersonaIly, I use a 2.50 cheater and I look thru the top of my bifocals. Everyones eyes and needs are different but its worth a bit of effort to determine what works best for you.
If you think you might benefit from Reading glasses …just go into a drug store, grocery store, or even a dollar store and try on different strength reading glasses.
You should be able to read fine print clearly at about 18 inches away.
CLAMS as a reminder checklist When practicing TIG Welding.
There is an acronym in welding called...
CLAMS
It serves as a good checklist for learning to tig weld
Clams stands for:
- Current
- Length of Arc
- Angle
- Manipulation of puddle
- Speed of travel
Current includes polarity as well as amperage
DC for steels, AC for aluminum and use one amp per one thousandths of thickness up to around 160 amps
Length of arc should be one electrode diameter or less…a little bit longer while learning but not much
Angle of electrode should be around 15-20 degrees or less. Its pretty forgiving up to a limit as long as arc length is good.
Manipulation of puddle is accomplished by using the right amperage, with the right arc length, with the right angle, traveling at a consistent speed, and adding filler rod in a consistent manner….that means learning how to feed rod.
Speed of travel varies depending on the situation. While practicing, aim for 1/8” per second which equals one inch every 8 seconds which equals 5 to 6 inches per minute …speed comes with practice and aluminum will generally go faster than other metals….that is one of the reasons why tig welding aluminum is such good practice.
As you practice, ask yourself the CLAMS questions if things are not going well.
- Is the machine set to the right current?
- Was my arc length right?
- Was my torch angle in scope?
- Was I manipulating the puddle correctly, moving evenly and adding rod evenly?
- Was my travel speed ok?
The first Skill building Drill for Learning How to TIG Weld is:
Beads on Plate WITHOUT Filler rod

See more TIG Videos on How to TIG Weld here