6g test in your future? …Get dialed in on plate first..
P.S. Stay tuned, theres a sweet offer down below.
ROOT Pass Technique and settings
Starting the arc with scratch start tig
Technique for root pass
We decided to upgrade our best selling stubby gas lens kit into a 2.0 version. 🔥
We decided to upgrade our best selling stubby gas lens kit into a 2.0 version.
Here is what makes our stubby gas lens kit new and improved…
- * We added cup sizes so now it comes with 4,5,6,7, and 8 cups
- * We replaced the 3/32” gas lens with a high quality furick gas lens.
- * We added o rings for use with clear furick cups
With our new improved Stubby gas lens kit, you can now use furick clear cups like the clear 8 pro, the jazzy 10, fupa12, and so on as well as ceramic versions of those cups without needing to purchase the furick adapter kit. ( this change alone saves you $24.99)
Let's Talk Flow Rates for Different size cups
Pro Tip:
For most any cup size, 2.5 cfh x the cup size will get you in ball park.
But we need to have a little fudge factor so lets say 2-3 cfh times cup size.
…remember that flowmeters are not all accurately calibrated.
different situations call for different flow rates.
It depends on things like weld type, tungsten stickout, shop breezes, etc.
Recommended Argon Flow rates for gas lens cups in the Stubby Gas Lens kit
#4 cup - 10 cfh
#5 cup - 10-15 cfh
#6 cup - 12-18 cfh
#7 cup - 14-21 cfh
#8 cup - 16-24-cfh
OK now that we have good idea of flow rates needed, lets talk about what each size cup is good for.
Why use a #4 cup?
* save gas on flash tacks
* thin aluminum butt welds where full penetration is desired.
* Fillet welds on light gauge aluminumm
* When you need to conserve argon
I typically use an 8 for general tig welding of steels and stainless steels but sometimes the job doesn’t need that much shielding and maybe your low on argon.
I remember a few times when I was welding on a Saturday and needed to deliver a job to a customer on Monday morning.
Looked over and noticed I was running pretty low on argon and had let my spares get empty too.
Since the parts were carbon steel and were going to be black oxide treated anyway, the welds didn’t really need to be all shiny.
Stepping down to a #4 cup with only about 8cfh got the job finished without running out of argon.
Why use a 5 or 6 cup?…I like both a 5 and a 6 gas lens for aluminum.
I think if so many really good tig welders like Roy Crumrine and Brad Goodman swear by the #5 standard collet body cup, then it stands to reason a #5 gas lens will also perform in a similar way except a longer stickup can be used.
I really like to use the #6 gas lens for all around aluminum welding on various joints.
Gives a bit more gas coverage for edge build up welds, filling holes, and outside corner joints and makes it a bit easier to keep the tip of the rod shielded with argon
#7 and #8 cups are a good all around size for most metals.
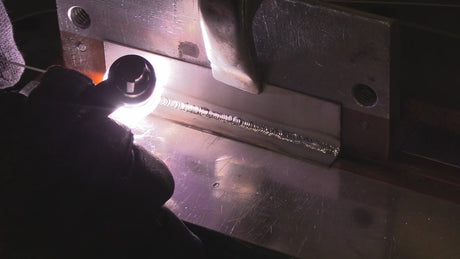
#8 pro clear is my go too cup when I am filming because it really helps you and me both see what is going on better when I film arc shots. ( a side benefit for me is that I can see where I am going better with a clear cup).
And it provides great coverage and lets me use a longer than normal stickout.
Which comes in handy when filming TIG welding videos.


