I don't always use a gas lens on aluminum.
In fact there are many situations where a standard #5 cup and collet body work just fine. Sometimes even better than a gas lens,
But for the particular weld in this video, I was using an air cooled 17 style torch.
So I decided to use a gas lens setup because the extra mass you get with a large diameter gas lens collet body helps keep the torch cooler...at least a little bit.
A 17 style air cooled torch is typically rated at 150 amps but I often go higher than that for short periods without a problem.
If I were to get an order for 100 of these parts, I would definitely go with a water cooled torch.
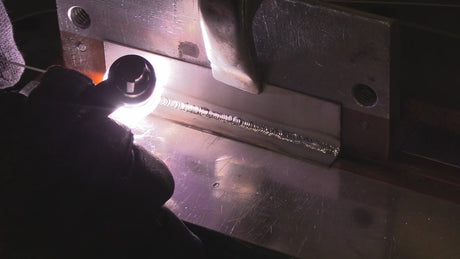
The weld is a solid plug welded on the inside diameter of piece of 1/4” wall thickness tube to form a corner joint.
On a corner joint like this sometimes the main objective is to wrap the corners with the edge of the bead in one pass so I rounded the tip of the tungsten and set my amperage to 200 and used a foot pedal to control my amperage.
I used all 200 amps at first but quickly let off to 175-185 amps once the part heated up.
I used a rounded 2% lanthanated tungsten electrode.
When I am in the upper limit amperage for a 3/32" tungsten, rounding the tip seems to help maintain the same shape from start to finish and also helps wrap the corners on the joint.
An outside corner on 1/8” aluminum does not require a super wide bead so I only slightly rounded the tip of the electrode for better arc starts and a bit more control.
A tee joint is a different story. Getting penetration all the way into the root of the joint can be a challenge.
So for the tee joint, I just left the tip tapered and allowed it to round off on its own.
Here are a few takeaways from this video.
I did three different joints and different thicknesses of aluminum and I used the same 3/32” 2% lanthanated electrode for everything.
I could have used a larger electrode for the first joint that was thicker but I don’t really like to switch electrodes unless I really need to so just rounding the tip did the job.
I also could have just welded all three joints with the same rounded tip but in my opinion it just worked better to tailor the tip for each joint.
I also want to point out that I used a slightly longer electrode stick out than I would normally… strictly for filming so we can all see the puddle better.
I showed a subtle technique where I lengthen the arc a bit while I am adding filler metal because puddle height usually grows a bit every time you add filler rod.
Lengthening the arc a bit while you add filler helps avoid taking the tip for a swim in the puddle.
Hope this helps,
Jody