Pulse TIG Settings
#1 Bead on plate on 3/16" Aluminum
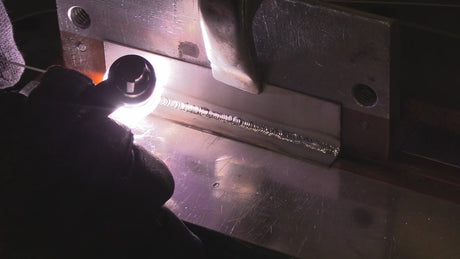
This first clip is welding a cosmetic bead next to the edge on some 3/16” thick 6061 aluminum.
This is a clip from a future video I am working on about travel speed.
I used 1pps, with 33% back ground and 50% pulse width.
For thicker aluminum like this a higher background current and pulse width can work well.
Filler rod is usually added during the hot part of the pulse cycle and using 1pps can actually help you with developing your own consistent rhythm even when you turn the pulse off.
Some training manuals even recommend using pulse as a training tool for beginners to help establish consistent wire dabbing.
These pulse settings seemed to work well in controlling the width of the bead and also in edge control. You can see that the toe of the weld bead went right up to the edge but didn’t melt the edge off.
#2 TIG welding round parts on a turntable
I got a side job a while back that involved welding about 50 carbon steel tubes that had a flange on one end and a chamfered insert on the other.
I used a 210 amp machine for this job because a company sent it to me to test out so I was limited to 210 amps.
When you use pulse settings, you need more amperage set on the machine than you would normally use without pulse.
So while I might have used 150 amps without pulse, I needed more with pulse settings.
My goal was just to keep the wire in the puddle and put some nice ripples in the weld for a nice looking bead so I set the machine to 210 amps with pulse settings of 2pps, with 60% background current and 60% pulse time.
Using this relatively high background and pulse width settings worked very well with my limited amps on the 210 amp tig welder.
#3 Oil filter housing on turntable Autogenous weld
My friend Roy took on a job that required welding lots of small filter housings on a turntable and he let me film some of it.
Roy used pulse settings for an autogenous (without filler metal) weld.
Using 2pps with around 20% background and 20% pulse width.
The 90 degree fitting required using a Furick 12 clear cup with nearly an inch stickout and the weld was made without filler metal per customer specs.
Learn more about the cup used and tig kits here.
#4 Chamfered insert on turntable
This is the other end of the tube welded earlier using a stationary tig torch holder so the same pulse settings were used.
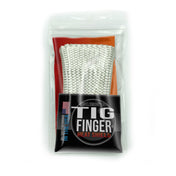
For these welds, I propped with a TIG finger XL to demonstrate just how useful a TIG finger can be for a place to prop right next to really hot metal.
Settings were 2PPS, 60% background, 60% pulse width.
#5 Edge weld on .120” cold rolled steel
Higher speed pulse settings can help when making an weld on or near and edge. Edge build up is a common task in some industries and using a pulse setting of 39 PPS, 30% background and 50% pulse width can help make the bead wander less on an edge weld. This weld could have easily been done without pulse but pulse makes it just a bit easier. For thinner metals like .030”, these settings can help a lot.
#6 End Cap welded on carbon steel oil tank .090” thickness
This weld could also easily be done without pulse but using pulse settings of 2pps with 30% background and 50% pulse width made a difference since I was trying not to full penetrate. I have plans for these pieces and one day soon you might see some fun finished metal art made from these parts.
#7 TIG Brazing with Silicon Bronze
I like to experiment with pulse settings for tig brazing using silicon bronze filler metal.
Silicon bronze is not nearly as strong as ER70S2 or 6 filler metal but for certain artsy projects like handles on industrial furniture it is fun to work with a looks nice.
There are several practical uses for silicon bronze too like building up a worn area on a hydraulic tube or for temporary fixtures or for joining copper to steel.
1 to 2 pulses per second with background of 30% and pulse width of 50% can really help control heat. It really helps to use a cup like a furick jazzy 10 ceramic to provide enough gas shielding to keep the puddle clean.
#8 16 ga Stainless lap joint Autogenous weld (without filler metal)
In some industries like for food processing tables, sometimes stainless is welded without filler metal.
Settings I found to work on a 16 ga stainless lap joint were:
2PPS, 20% background, 50% pulse width with main amperage set to 69.
#9 Cold Rolled 11Ga outside corner joint using lay wire technique
2 PPS, 30% background, 50% pulse width with main amperage set to 142 worked well using 3/32” filler metal and the lay wire technique where the wire is left in the puddle.
These same settings also worked extremely well for TIG brazing using 3/32” silicon bronze .
#10 Carbon Steel fillet weld on turntable
Wall thickness was around 3/16” on this weld
Even though I was using a different tig welding machine, I referred back to a previous turntable weld and used the same settings.
2PPS, 60% background, 60% pulse width with main amperage set to 210.
As previously mentioned when you use pulse settings you typically need to set main amperage 1.5 to 2 times what you might use without pulse turned on.
#11 When you combine pulse with chill bars, you can sometimes really limit distortion.
I used a very low background setting of 5% with a pulse width of 30% along with chill bars on an outside corner joint a few feet long and was very surprised at how well that worked when also using chill bars.
My chill bars were carbon steel and only around 8 inches long so I had to stop every 7 inches and re clamp them but it worked out well.
Invest in Yourself with a PrimeWeld TIG Welder Bundle


1 comment
Thanks for all of the excellent tips. Much appreciated.