This page goes with our "How to TIG Weld Aluminum" beginners guide.
If you landed here on accident, here are some good links for other tig welding posts
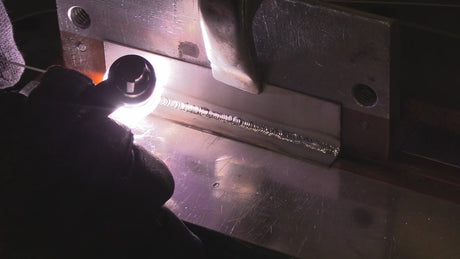
With a foot pedal, starting and ending a bead on aluminum looks something like this
- Hold the tig torch where you want to start the bead with the tip of the tungsten gapped about 1/8” from where you want to start the arc.
- Press the foot pedal slightly to where you get an arc and see the cleaning action dancing around
- Hold torch still and Gradually press the foot pedal more until you see a wet shiny semi round spot which is the weld pool aka puddle.
- Dab filler wire into the puddle…remember you want the puddle to metal the wire …not the arc.
- Progress the puddle forward about 1/8” and pause while adding another dab of filler wire.
- Repeat this until the end of the bead.
- About 3 dabs before the end of the bead, start to let off the pedal slowly to decrease amps.
- Continue dabbing filler metal until the end and while the amperage is tapering, move the arc around to avoid a crater
- Completely let off pedal and hold torch still while post flow gas flows for long enough to keep the tungsten tip silver.
the video below shows several applications for different Cup sizes and Argon Flow Rates


Welding flat beads on plate is a beginners skill exercise.
Save the plates for the next skill exercise which is padding beads also called stacking beads half way over the previous bead.

Padding beads on Aluminum is some of the best practice for TIG welding all metals because it helps you get your filler wire feeding skill up to speed.
learn about simple aluminum metallurgy here