The 2 Biggest Challenges When TIG Welding 300 Series Stainless Steels:
1. Maintaining Stainless Properties
2. Distortion Control

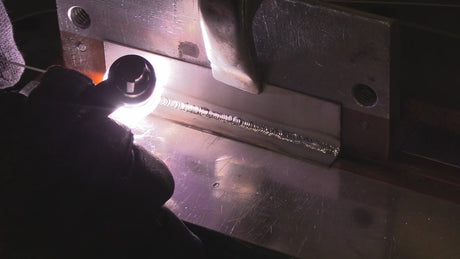
TIG welding 300 series stainless steels—like 304, 316, and 321—requires a level of finesse and understanding far beyond what’s needed for mild steel. These austenitic stainless steels are known for their excellent corrosion resistance, strength, and aesthetic finish, which is why they're used in everything from food processing and medical equipment to marine and aerospace applications. But with those benefits come a few headaches—especially when it comes to maintaining corrosion resistance and controlling distortion.
Let’s break down these two major challenges, why they matter, and how to tackle them effectively.
1. Maintaining Corrosion Resistance
Why It’s a Problem
The whole point of using stainless steel is its ability to resist rust and corrosion…especially when used in environments where the slightest corrosion can compromise the performance and even accelerate failure of the weld.
Improper TIG welding procedures can ruin the corrosion resistance properties of stainless steel.
When stainless steel’s corrosion resistance is compromised—through overheating, poor shielding gas coverage, or contamination—you risk introducing sensitization, which is the formation of chromium carbides along grain boundaries. This depletes the chromium where it’s needed most and creates a path for corrosion to attack.
And if you contaminate the weld with carbon steel tools, carbon grinder dust, or even the wrong filler metal, you could leave behind iron particles that start compromising the stainless —often without anyone realizing it until the part fails.
How to keep stainless steel stainless
- Gas shielding: 100% argon is the most common and versatile gas for tig welding stainless even though there are other mixes that are sometimes specified for specific purposes. Ensure you have solid post-flow and good coverage from the cup. A gas lens setup can help a lot.
- Back purge your full penetration welds: Especially for piping or tubing, purge the inside with argon to protect the root from oxidation aka sugaring/granulation.
- Use dedicated tools: Don’t use tools that have been used for carbon steel—contamination starts with the smallest speck.
- Pick the right filler rod: Match your filler metal carefully. For 304 base metal, ER308L is a common choice. For 316, go with ER316L.
- Watch your temperature: Avoid overheating the metal. Keep heat input low and control your puddle. Keeping heat input low does not always mean low amperage. Use an amperage that allows you to get the puddle Established quickly and that allows you to have a fast enough travel speed to avoid excess heat build up.
2. Controlling Distortion
Why It’s a Problem
Stainless steel expands and contracts more than mild steel when heated—especially the 300 series. That means as soon as you lay down a TIG weld, you’re inviting stress into the part. On thinner materials (like 16–18 gauge sheet), it’s incredibly easy to warp, buckle, or twist a component out of dimensional tolerance.
Stainless does not conduct heat well so heat builds up quickly. This is why I always stress getting a puddle established as quickly as possible and to get moving as quickly as possible.
How to Fix It
- Use chill bars or clamps: Copper or aluminum backing bars, heat sinks, or even aluminum clamps can absorb heat and stabilize the part.
- Tack strategically: Use tight, frequent tack welds to keep your piece locked in position as you weld. This minimizes shifting and warping.
- Weld in short bursts: Use the stitch or skip method. Weld a few inches, move to another area, and come back. Letting the material cool in between is critical.
- Pulse your TIG welder: If your machine has pulse mode, use it. Pulsing helps control heat input, especially on thinner material.
- Fit-up matters: take time to get good fit ups. Gaps will cause excessive heat buildup and lead to distortion. A tight, clean joint is easier to weld and manage.
- Practice joint sequencing: Think through your weld order. Welding from the center outward or alternating sides can distribute heat more evenly.
Bonus Tip: Surface Appearance and Cleanup
Because 300 series stainless is often used where appearance matters, keep your welds clean and uniform. Use a stainless steel wire brush (never one used on carbon steel), and consider passivation or electro-polishing if the weld will be in a corrosive or sanitary environment.
Electropolishing not only remove heat tint but also removes the top layer of material to reveal a more corrosion resistance layer
One convenient way to electropolish is with an EASLYkleen weld cleaner.

TIG welding 300 series stainless steel is like walking a tightrope: you need to balance heat control, gas shielding, and technique with the goal of strength, cleanliness, and maintaining corrosion resistance. If you overlook either corrosion prevention or distortion control, your stainless weld might look pretty now—but fail in the real world.
Get your technique right, keep your setup clean, and manage your heat, and TIG welding stainless can be one of the most rewarding and precise forms of metalwork you’ll ever do.