Back to Basics TIG Welding Carbon Steel
(Getting Back to What Really Matters)

See the Complete FAQ page for the Primeweld TIG225x

See the Complete FAQ page for the Primeweld TIG225x
![]()
If you've been TIG welding for a while, you already know how easy it is to get lost in the weeds—fancy settings, exotic cups, pulse numbers, miracle rods… all that stuff has its place, but none of it matters if you skip the basics.
Carbon steel is one of the best materials for learning to TIG weld and for sharpening your technique. Its cheap and readily available and lets you know when things get out of scope.
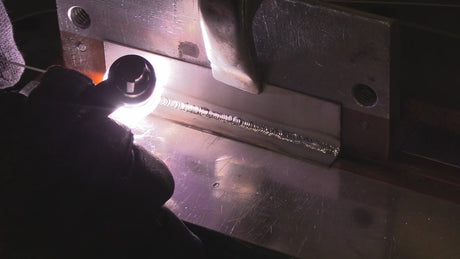
When you do things right, the puddle flows smooth.
When you don’t… well, carbon steel doesn’t hide your mistakes.
So let’s get back to the fundamentals that make the biggest difference.
1. Clean Your Metal
This is where everything starts.
Mill scale, rust, oil—it all causes headaches.
A wire wheel is okay sometimes, but other times a flap disc or even a hard rock on a grinder is needed to get you down to bright, shiny metal, and that’s what TIG likes.
If the metal isn’t clean enough, nothing else in this article will work the way it should.
2. Use the Right Tungsten — and Keep It Clean and Sharp
For carbon steel, there are several tungsten types that will all work just fine.
2% thoriated, Ceritated, LaYZr from CK, E3 or 2% lanthanated tungsten all works great for carbon steel. A 30 degree taper is a good rule of thumb and it doesn’t matter if you have a tungsten grinder. Just make sure to make all the grinding marks run lengthwise and dont use too rough of a grit . ( you can always touch up with a flap disc to smooth deep grind marks).
But here’s the thing…
A contaminated tungsten will make even the best welder look like a rookie.
If you dip, stop.
Resharpen.
You’ll save yourself a ton of frustration.
Even a tiny bit of carbon steel metal stuck to the tip of your tungsten will mess things up.
Pro tip. Sharpen several pieces of tungsten at one setting so you can easily swap out for a fresh one.
3. Gas Shielding Matters More Than You Think
Pure argon. Around 2-3 cfh per cup size. (Example a #7 cup needs 14-21 cfg).
No drafts. No fans blowing across your weld table. And make sure the fan from the machine is not blowing over your welding area.
If the arc looks fuzzy or the puddle gets grainy or dirty, shielding is the first thing to check.
make sure all gas connections are tight and not leaking. ( a soapy solution spray on connections will reveal leaks )
4. Keep a Tight Arc Length
This is one of the biggest separators between a good weld and an ugly one.
The rule of thumb: keep the arc length to equal or slightly less than the electrode diameter.
The closer you are (without touching), the smoother your arc and the more controlled your puddle.
A long arc makes everything hotter, wider, dirtier, and harder to control.
Stay tight. Stay steady.
5. Maintain a Good Torch Angle
Aim for a slight push angle—about 10–15 degrees.
Too much tilt can cause the tip of your filler rod to ball up and melt prematurely before it feeds into the puddle.
There are always exceptions and torch angle can be very forgiving provided a tight arc is maintained.
6. Keep the Hot Tip of the Rod in the Argon shielding
This one trips up a lot of beginners.
You dip the rod, you pull it back, and the hot end gets oxidized.
Then you put that oxidized tip back into the puddle… and everything goes downhill.
Oxide islands floating around in the puddle make for a sluggish puddle.
Keep the rod in the gas envelope and life gets a whole lot easier.
7. Use the Right Amperage
For carbon steel, a rough guide is one amp per thousandth of thickness.
1/8” steel? Around 125 amps.
3/16”? 160–180 amps.
But this is where the one amp per one thousandths rule ends.
As an example, you don’t need 500 amps to weld half inch thick steel.
When using a foot pedal or torch amperage control, you might want to set the machine amps about 30% hotter than what you think you will need and control the amperage with the pedal or finger control. This will give you a little extra heat for welding over tack welds.
8. Practice Your Beads the Right Way
This might be the most important part.
Lay down straight beads without filler metal when you are first learning.
Then weld beads with filler metal.
Then overlap beads by half. This is called padding beads and is some of the best practice you can get.
Carbon steel is affordable, predictable, and forgiving—perfect practice material.
The more beads you run on plate, the easier everything else becomes: outside corners, fillets, T-joints… even pipe roots.
Final Thoughts
TIG welding carbon steel doesn’t have to be complicated.
When you focus on clean metal, a sharp tungsten, tight arc length, good gas shielding, and solid technique, everything just works better.
And here’s the truth…
Mastering the basics here pays off big-time when you move on to stainless, aluminum, titanium, or anything else.
Back to basics isn’t going backwards.
It’s building the foundation that makes everything forward go smoother.